0 of 0


About this mod
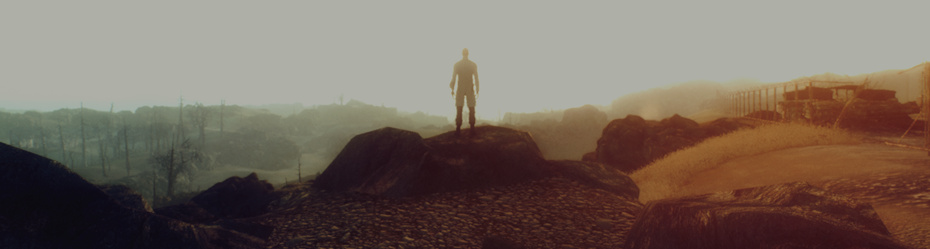
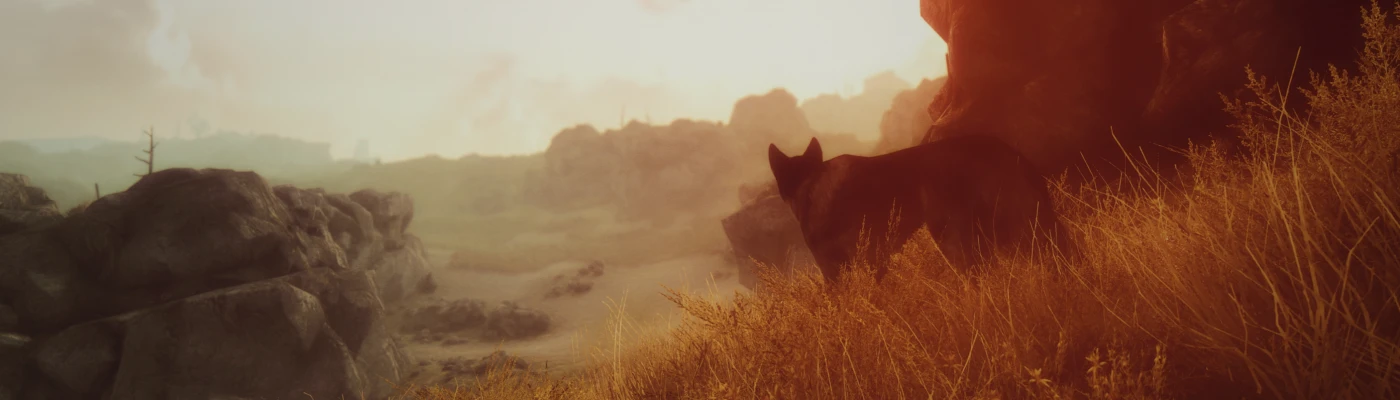
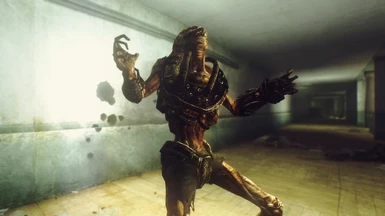
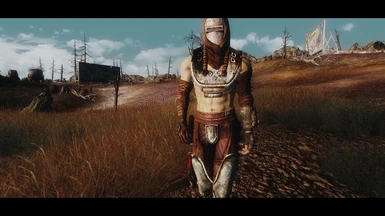
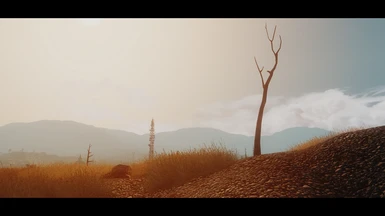
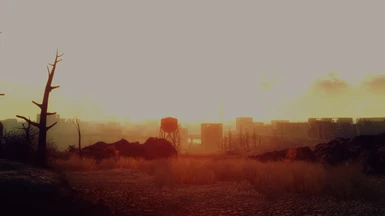
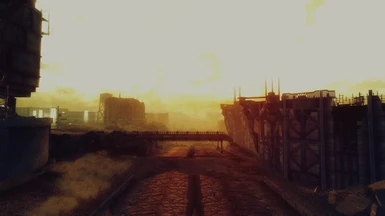
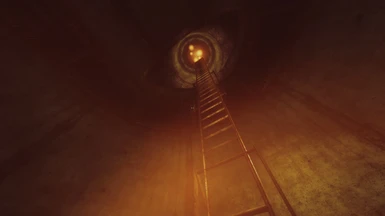
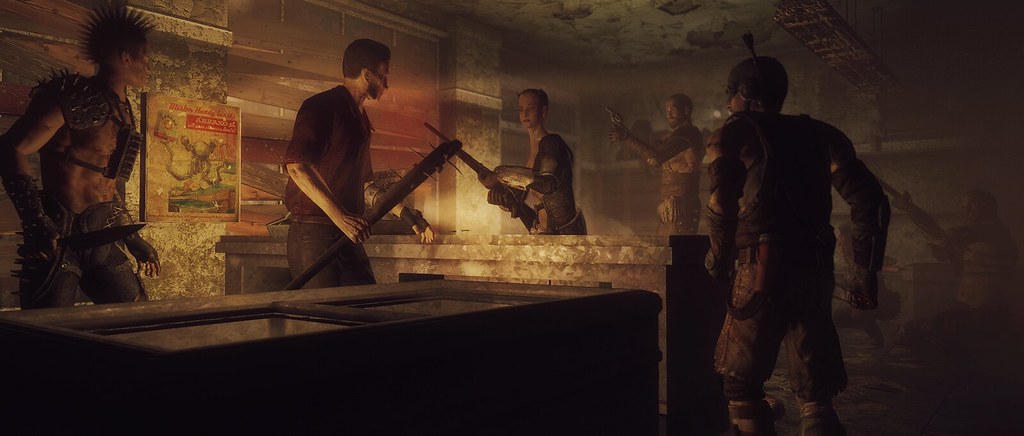
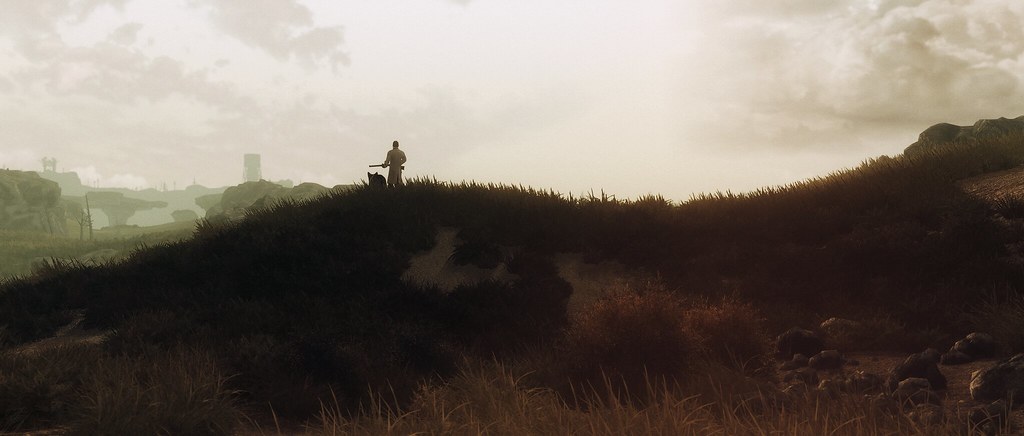
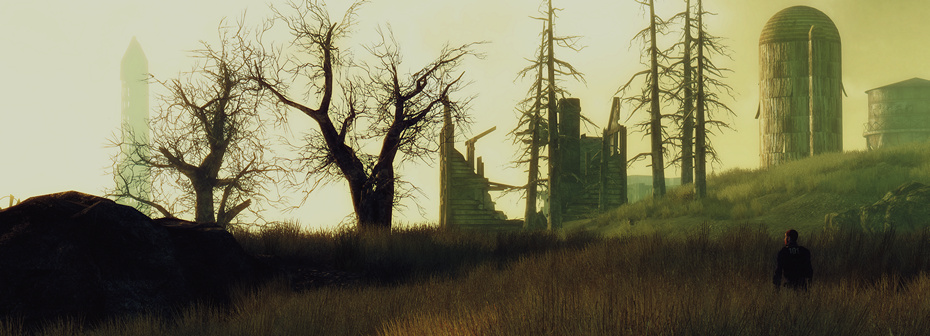
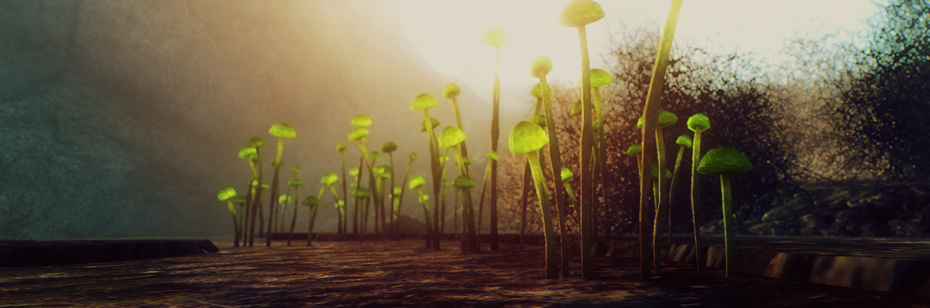
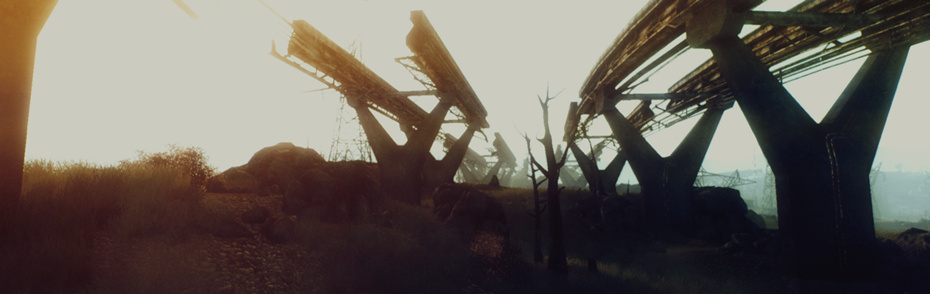
Adds post-processing FX, e.g. lighting and color correction, ambient occlusion, detailed shadows, dynamic depth of field, immersive bloom, lens and anamorphic flares, dramatic skies, film grain, FPS-friendly SMAA and EdgeAA. It will change the way you experience the game and steep the Wasteland in visual splendor.
- Requirements
- Permissions and credits
Showcasing my current progress on getting a new version of Midhrastic out. If you're feeling brave, you can find my WIP builds for Midhrastic (both for FO3 and F:NV) in my Google Drive folder - binaries included. No support for those versions, but they can yield good results.
More WIP screenshots on my Fallout 3 Flickr gallery.
Installing this might seem daunting. If you're scared of reading readme's, here's a small instruction on how to install this. IF you get it to work using this: great. If you don't, or if you think something is wrong, READ the rest of this page, and the comment thread before asking a question that's already been answered, PLEASE. If you view the comments thread via the forum, you can also use the search functionality there. DO IT.
Installing this is actually not that hard. All the exposition below is for when you have problems, want to tweak, or need to know what mods do or don't combine with this ENB, or how to work on performance, as ENB's can be quite power-hungry. All that aside, it's quite easy to get started:
0. Update your DirectX. Seriously do it. Especially if you're on Windows 8 as it lacks the necessary files.
1. Download the v0.118 package for the 1.0 version of Midhrastic and the v0.249 package for the 2.0 version of Midhrastic and ONLY unzip the d3d9.dll from the wrapper directory to your main Fallout 3 directory, NOTHING MORE. (If the wrapper version doesn't work for you, you should skip using the dll and use the injector version and read the instructions on how to make that work inside the archive you get from enbdev.com.)
2. Get my download from the download page and simply put ALL files into your fallout 3 folder. ALL. If there's a DATA directory in the release, you can install that as well (just drop it in the Fallout directory and the Data directory will merge with yours, possibly overwriting some files you have installed already). If you don't like just dropping a Data folder in your installation, zip up the contents of the Data directory in my ENB, and add that archive to your Mod Manager as a mod, and activate it there. You can easily uninstall it then. If you manually install the Data directory be sure to enable the URWLENB-002-Interiors.esp via your Mod Manager.
3. You must have HDR enabled, Water Displacement OFF, and ANY in-game anti-aliasing and anisotropic filtering set to OFF, which you can all do via the game ini's if you know how or by using the game's Launcher, and entering the advanced options, there. When done setting it up, exit the Launcher, and start up the game normally (via FOMM, NMM, FOSE, or (and I advise you check it out) the fantastically versatile Mod Organizer).
4. Check if it looks like the shots I share in the imagesection (although those shots are from various versions of Midhrastic, some of them unreleased). If it does, you're home free. You can also hit SHIFT+F12 while in-game to see if there's a change. If there's not, you've done it wrong. If there is, you did right.
5. Trouble, come back here, research, and get help.
6. If you're using a version of Midhrastic post-1.0, you can use the in-game ENB GUI to tweak parameters. Hit Shift-ENTER to access and exit it. To change the strength and behaviour of the DOF effect, go to the shaders pane on the right and edit the Aperture, FOV or Max Blur parameters of the ENBEFFECTPREPASS shader.

Midhrastic is an ENB configuration for use with Fallout 3 (and possibly also New Vegas). It was based off the ENBseries binary and shader files designed by Boris Vorontsov (of enbdev.com). ENBseries is an image post-processing method hugely popular in games such as Grand Theft Auto IV and Skyrim, and many users have designed their own configuration using original and scrounged code and personally tweaked values. I’m a tweaker and scrounger myself. Upon recently discovering that Vorontsov released an experimental binary for use with Fallout: New Vegas, and after trillville (a.k.a. Anthemios) used it to great effect in Fallout 3, I had to try and design my own ENB. What you can download here is the result of that desire.
I've started my ENB tweaking in Skyrim, which resulted in my Midhrastic ENB for Screenarchery. The things I learned doing that were of much use to me here, even though this configuration is built quite differently. This first release is very definitely not a final build: Boris Vorontsov is still engaged in adding features to the Fallout ENB, which will enable tweakers to fine-tune their configurations better and better and will add possible new effects such as complex indirect lighting, advanced shadows, and better colour correction controls. I've tried my best to make sure this ENB config looks good across the board. Some areas and times of day look exceptional (to my taste) and some still have problems. But I'll take this over the way the vanilla game looks any day. In fact, playing around in Fallout 3 has become an entirely new experience for me now. I hope you'll give this a try and if you do: please leave me some feedback. If you want to get a good feel for what this has to offer, run around a bit using the console to speed up time (i.e.: set timescale to 400 or so). Explore a bit, see the sights, and find out if this takes your fancy. The screenshot area and this description feature images shot using this configuration. I've also put together a growing collection of high resolution images on my Fallout 3 set on Flickr. Check it out to see what you can expect.

A non-exhaustive list of (configurable) effects that this mod adds to your game includes:
- palette based colour correction
- SSAO (screen space ambient occlusion)
- indirect lighting
- advanced immersive bloom
- dynamic depth of field
- ENB lens flare and anamorphic lens flare
- changed lighting intensity and curves, altered cloud and sky gradients
- eye adaptation
- film grain
- SMAA: Enhanced Subpixel Morphological Antialiasing (gets rid of jaggies at a much lower performance cost than normal AA solutions)

There are specific installation instructions below, which you'll do well to follow, especially if this is your first try at using an ENB. The main binary file which this config is based around will have to be downloaded from the developer's site (see below). For an ENB rookie, installing this might seem daunting, but it is actually quite simple and the end results can be well worth it.
Also, it must be noted that using ENB will tax both your CPU and especially your GPU. The FPS hit is unavoidable, but will differ between users, depending on things such as graphical card used, texture mods installed, rendering resolution and ENB effects enabled. In the Performance section below, I'll sum up some things you can do to lessen the impact.
D E M O N S T R A T I O N S
A great video by Hodilton, who can be considered as the go-to guy for expositionary ENB videos. I think he bought Fallout just to shoot this video. Do note that he uses all recommended mods, including F3Project Reality MkI. Also understand that using that specific mod changes a LOT of how Midhrastic looks, especially in exterior cells. I recommend first playing Midhrastic without it for a while, and then seeing if you like it better with Project Reality.
_
These videos by DrunkStonedDizzy also show well how Midhrastic looks inside and outside (also using F3Project Reality MkI):
____
And a couple quite inferior ones by myself:
____

1. This is one of the first ENB configs for Fallout 3. But there are bound to be more. If you’ve already used an ENB for Fallout, back up that config.
Back. It. Up.
Also back up Fallout's original d3d9.dll file.
2. If you've used ENB before, make sure you’ve removed any old ENB-files from the root of Fallout’s game directory (after backing them up). That means effect.txt files as well. You’re welcome to add them in later, but don’t blame me for how something looks if you didn’t first try it as I released it.
3. Midhrastic ENB for Fallout 3 v1.0 uses the Fallout: New Vegas ENB v0.118, found on Boris Vorontsov's download page here. Older and newer builds can be found on this page.
These packages contain both an ' Injector version' and a 'Wrapper version'. Only those using nVidia Optimus technology should use the ENBseries .118 ENBinjector instead of the d3d9.dll (read the documentation on how to inject ENB into your game executable). Everyone else should use the d3d9.dll from the wrapper folder, and should drop ONLY the d3d9.dll into their main Fallout 3 game folder (not the DATA folder), replacing any (backed-up) original. You need NO other files from the downloaded archive (but you might want to read the included readme's).
TAKE NOTE: the .118 binary is INCOMPATIBLE with any form of hardware anti-aliasing. Turn it off for Fallout! Make sure you have these lines in your ini's (check them both):
iMultiSample=1
iMaxAnisotropy=1
iWaterMultisamples=1
bTransparencyMultisampling=0
Since 2012.08.31, both the .116 version and the .118 version support ATI/AMD hardware as well as nVidia cards. The .116 version is a slimmed down version with less advanced graphical options. If the .118 binary doesn't work for you for any reason, you can always try running my ENB with the .116 binary.
4. Download a version of my Midhrastic ENB configuration from the download page here. Don't use a mod manager (FOMM, NMM) to manage this mod, as the contents of the archive don't go to your DATA folder but the main game folder! Open my file package, and extract the contents to your main Fallout 3 folder, where your game executable and the ENB d3d9.dll are located.
The core files of this ENB configuration are:
- -palette.bmp - you can always try your own preferred palette file with my config, but that can lead to unintended and unsupported results.
- -enbseries.ini - the meat and bones of ENB, easy to tweak.
- -enbeffect.fx
- -enbbloom.fx
- -enbeffectprepass.fx
- -d3d9_smaa.dll
- -SMAA.h and SMAA.fx
- -injector.ini
More on configuring SMAA to be less performance intensive in the Performance section, further down.
If this is your first ENB, watch this short introductory video by hodilton that shows you how to install any ENB preset. It was made using Skyrim as an example, but the procedures are identical.
5. It's always a good idea when installing a new ENB to go to your My Documents/My Games/Fallout3 folder and delete the rendererinfo.txt, back up your Fallout.ini and FalloutPrefs.ini. Then run the game via the default launcher once (not FOMM, FOSE, or any other means). The launcher will now redetect your video card and the d3d9.dll from ENB and will set up a new rendererinfo.txt and the two ini's you backed up. You can then swap back in your backed-up ini's, especially if you tweaked those heavily. If you ever have trouble launching the game, playing with these fresh ini's for a bit might help you decide if the problems you have lie with your ini configuration. ALWAYS make sure the old ini's are properly configured for this ENB (no antialiasing enabled, your graphics card properly recognized and named under [DISPLAY] in FalloutPrefs.ini in the line that starts with sD3DDevice=. When your ini's are back in place and rendererinfo.txt is generated, you should be able to launch the game with ENB via your normal launch procedure and have the ENB work like it should. If you have problems, read this page (FREQUENTLY ASKED + TIPS especially) and the comment thread. Chances are your specific problem has already cropped up before.
6. If you want to run the game using ENB, you will probably experience problems and glitches if you also run any program that adds an overlay to your game (such as but not limited to FRAPS, Steam, Xfire, EVGA Precision, MSI Afterburner and others). Disable those programs before running with ENB. It seems running software like Game Booster can lead to CTD's as well. Sometimes programs like that have dll's running that try to put overlays into Fallout 3 (e.g. FPS counters, even if you have disabled them in the program's setttings). If you're getting inexplicable CTD's, close down as much as you can and see if it helps.
To uninstall, simply remove all files that were put in your Fallout 3 folder, and restore the original Fallout d3d9.dll.


Apart from the mods that I use almost religiously because I like them, I have no mods that are actually required for v1.0 of Midhrastic ENB. Under the FAQ+TIPS section below I discuss some mods that most probably won't work with or will even undermine my configuration because of technical incompatibilities. The mods that I do recommend are those that affect the world visually in some way, and were active in my load list when I tweaked this ENB or mods that worked really well with it and that I picked up later. As always, first try Midhrastic and then start adding other mods.
Fallout Street Lights
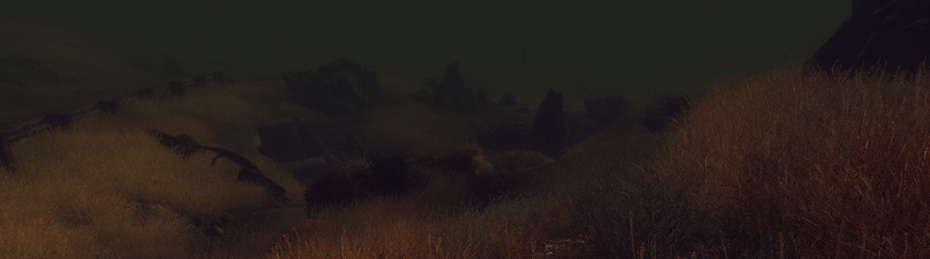
Some nights can get pretty dark. A bit of light doesn't hurt. My nights aren't as dark that you really need this, but if you also install the following mod, these lights become increasingly convenient. Added benefit: they add a bit of visual pizazz to the Wasteland.
Light of Night
This mod changes the ambient light settings at night. I use the starlight variant. Why not use ENB to make nights darker? Well, my interiors would become too dark, as both lighting schemes are linked (this may change in a later version of the ENB wrapper).
Megaton Lighting Overhaul
My ENB enhances light. This mod makes sure that the lights in Megaton actually throw light for my ENB to play with. Good combo.
Xepha's Darkened Interiors
Give a little extra OOMPH to the darker corners of the Wasteland's interiors. Very good mod. An alternative is Realistic Interior Lighting by Scarecrow. If you use one of these, do bring a good PipBoy Light Mod. I prefer the one by Xionanx for its configurability and the different available colours.
F3Project Reality MkI
Against all my expectations, preliminary testing shows that this mod actually works quite well together with Midhrastic. It adds new weather and lighting. It does change a lot of Midhrastic's intended look and some weather patterns have some serious problems. Just try it to see if you like it, but do try Midhrastic without it first.
EDIT: Quite some weather types and circumstances generate less than desirable results. So Project Reality lies somewhere between 'recommended' and 'don't expect it to work'. You're in fact getting an experience that is not what I aimed for in Midhrastic. But if you like it, do use it, but don't complain that Midhrastic is b0rked: it's the combination that's trouble.
If your game runs well using ENB, you can gradually add more and more texture mods, at increasingly higher resolutions. But beware: never stack up more than your GPU can account for. The higher the texture resolutions you're going to use, the more VRAM you're going to need. Fallout 3 is very prone to crash when it has to work too hard. Use a mod manager to quickly reduce the amount of texture mods you're using.
If anyone wonders what further mods I use, this is my list from 2012.08.27 and here is the one from februari 2013.

MY SETTINGS
These are my ini's: Fallout.ini | FalloutPrefs.ini.
This is my rendererinfo.txt, which shows you what shaderpackage my twin GeForce GTX 560ti OC use, and a couple important game settings I've set via the ini's. Except for the shaderpackage and GPU yours should look pretty much the same.
This is my modlist of August 4th, 2012 (experimenting heavily) and here is the one from februari 2013.
ATI/AMD USERS
Check in your Catalyst Control Center that Antialiasing is NOT set to forced ON. Make sure that it is off or set to "Use application settings". Also, if you experience problems using ENB in-game, try setting ForceNVidiaCard=true (in enbseries.ini) and if that doesn't help, also set ForceNVidiaCaps=true. This is not guaranteed to help, as ATI/AMD is not well supported in .118.
ANISOTROPIC FILTERING
AF is enabled in enbseries.ini by default (you can put it to FALSE there if you want). I advise you to turn off hardware or game anisotropic filtering.
FPS LIMITER
You can toggle on and off ENB's FPS limiter (for possibly smoother gameplay) by hitting HOME in-game. It's off by default, and when activated will limit at 30 FPS.
BUILT-IN FPS COUNTER
Hitting the ‘*’ ket on your numberpad toggles a framerate counter at the top left of the screen.
SCREENSHOTS
If you want to take lossless screenshots (bmp’s that get dumped in your game folder) that include the anti-aliasing that SMAA provides in-game, you have to use the END key on your keyboard. If you use any other means, results can vary. Steamshots will not include the anti-aliasing for instance. In SMAA's injector.ini you can change the keycode for which key you need to press to take a lossless screenshot. A link with a list to the various keycode values is present in the injector.ini.
REFRESH THE ENB WRAPPER IN-GAME
The key to reload the ENB after you’ve alt-tabbed out of the game to make any changes to the configuration files is BACKSPACE (pretty handy for tweaking, that).
SWITCHING ON/OFF ENB POSTPROCESSING IN-GAME
Press SHIFT+F12. Try this to see the difference this mod makes! (Steam users: set your screenshot key to something different than F12.)
CONFLICTING MODS
If you want to experience this ENB as intended, first disable and remove any mods that change the lighting and postprocessing such as Fellout (greener grass option is okay), The Imaginator, DYNAVISION, Director's Chair, Enhanced Shaders, CINEMATECH. Some aspects of these mods can be compatible with ENB, whereas others may not be. You are free to experiment, but the advice is to turn these off before your first try with ENB. Other lighting mods that do work well together with this config include F3Project Reality MkI, Realistic Interior Lighting, Megaton Lighting Overhaul, Light of Night and probably very many others. There will also be a lot of mods that won't conflict or work well, but just won't work at all. Mods such as Advanced Recon Thermal Nightvision won't work. You can install them, but if you want to see their effects, you'll have to switch off ENB postprocessing (SHIFT+F12). This has to do with how ENB bypasses the game's original colour correction. That's just the way it is.
HDR LIGHTING
Make sure you have the line 'bDoHighDynamicRange=1' in the [BlurShaderHDR] section of your FalloutPrefs.ini. You can now have both HDR and ENB bloom at the same time! It's quite essential for the look of this ENB, but if after seeing it you don't want HDR, put it to 0.
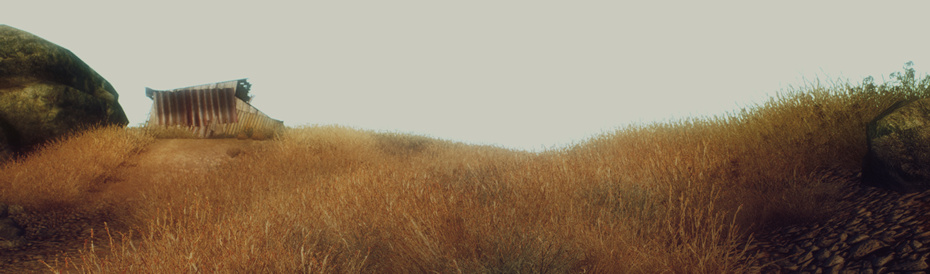
GORGEOUS GRASS
With the lack of shadows on the ground, it's a good idea to have as much grass around as your computer can handle. Try tweaking your Fallout.ini to contain the following lines under the [Grass] section: iMinGrassSize=10 (or higher if too performance heavy, or when using 'Their World'); GrassPointLighting=1; bDrawShaderGrass=1; iGrassDensityEvalSize=2; iMaxGrassTypesPerTexure=4.
FOG
Fog settings can make or break how the game looks, especially because ENB influences how fog is lighted quite a bit. try varying your fog settings in-game using the console command 'setfog'. A good value (though FOV dependent) is 'setfog 4500,80000' but you can try varying both values (first is near fog, second is far fog). You can also go quite crazy with fog using this command.
WATER GLITCH
Currently there's a strange water glitch (you'll know it when you see it) that occurs when you have 'bUseWaterDisplacements=1' in your FalloutPrefs.ini. Put it to 0 and your glitch is gone. Sadly, you lose the ability to make ripples in the water though. This will hopefully get fixed by Boris V.
ANAMORPHIC FLARE APPEARANCE
If you open the enbbloom.fx file, you can search for
"float3 anamFlare = AnamorphicSample(0, coord.xy, fFlareBlur) * float3(0.35, 0.35, 0.35); //trichromatic Anamorphic Flare (adaptive)".I've added a couple notes to that area. By commenting out (= adding // before a line) all but one of the various flare options, you can change the colour of the flare that reacts to bright lights in-game. You can change the values, play with it a little. The effect can be huge. If you want to have a green tinge to a bright morning, go for a green flare, where you only put a number to the middle RGB value, and keep the others at 0. That will look a lot different from a red or blue monochromatic flare, or a colour-adaptive flare. Just try it a bit and see what changing those values does. You can make the flare effect even more pronounced by changing the value for '#define fFlareIntensity 0.10', also in enbbloom.fx to something higher.
The shots below are shot with four different Anamorphic Flare configurations, all at fFlareIntensity 0.20, which is slightly exaggerated for demonstration purposes. Used RGB values are noted:
Trichromatic AF (colour adaptive) @ 0.35, 0,35, 0,35______________________Monochromatic Green AF @ 0.0, 0.45, 0.0


Monochromatic Red AF @ 0.45, 0.0, 0.0_________________________________Monochromatic Blue AF @ 0.0, 0.0, 0.75


MANUAL DOF
For fun, try removing the comments before these lines in the enbeffectprepass.fx:
//#define USE_MANUAL_APERTURE 1
//#define USE_MANUAL_BLUR_SCALE 1
This will disable the autofocus on the DOF, and enable manual control (just like on a manual focus camera). You can use keys 1,2,3 and 4 in combination with PAGE UP/PAGE DOWN, to adjust DOF settings for a specific shot. Check out this schematic by Matso on what a couple important parameters are.
- focus distance (key '1') - focus depth, a value normally sampled from the focus texture, the depth of the pixel in the center of the screen,
- bias distance (key '2') - distance not taken into account in DoF (all closer then the distance is in focus),
- cut-off distance (key '3') - governs DoF smoothness; (bigger value results in wider depth of field),
- blur scale (key '4') - manually changes blur scale; enable it by uncommenting the 'USE_MANUAL_BLUR_SCALE'.
"The option of manual depth of [field refers] to manual application of changes to basic parameters of the depth of field effect while playing.
It has been added to help users that want create realistic movies in Skyrim, using this mod. Manual changes mean no automatic, dynamic accomodation,
thus all is in the camera-man's hands. To enable the option (disabled by default) uncomment 'USE_MANUAL_APERTURE', [...] in 'enbeffectprepass.fx'."
You can also set up the use of a manual switch (using key '7' between gaussian (simple blurry) and bokeh blur by uncommenting the 'USE_SWITCHABLE_MODE' and setting 'USE_BOKEH_DOF' to 2, both in enbeffectprepass.fx.
Matso's readme is also invaluable reading for anyone interested in configuring DOF to their liking, plus it also discusses some assets that I've used in Midhrastic as well.
USING SLI
It seems that using SLI reduces FPS by a bit versus running with a single card. This has not been thoroughly tested, so I'm glad to hear from anyone running SLI what their findings are.


I’ll collect some suggestions here which can help you with performance, without going for an exhaustive guide. Of course, some of these tips will gain performance with reduced splendour as a trade-off:
- SMAA PERFORMANCE - The included version of SMAA is configured at the ULTRA setting, which is most performance heavy. You can change this by opening the injector.ini file and changing the line: 'preset = SMAA_PRESET_ULTRA' to any of the other values listed above it. If you want to disable SMAA anti-aliasing altogether, open up enbseries.ini and change ‘EnableProxyLibrary=TRUE’ to ‘EnableProxyLibrary=FALSE’.
- LOAD TIMES – If you experience excruciatingly long load times: just hit SHIFT+F12 to toggle off the ENB during a loading screen, as this will significantly reduce the wait. Remember to toggle the ENB back on afterwards (SHIFT+F12 again).
- ANTI-ALIASING – It’s very important that you use this ENB config without any other form of anti-aliasing, either in-game or driver-based. Don’t use MSAA together with ENB. The included and enabled SMAA alone will take care of most your jaggies.
- ENBSERIES.INI TWEAKS - There's a couple additional options in enbseries.ini that really have an effect on performance. So if you've either got power to spare, or complaining hardware, these tweaks are for you. I'll discuss these from the perspective of someone trying to get better performance mostly. EnableAmbientOcclusion (SSAO), EnableDepthOfField (DOF), and UseIndirectLighting (IL) can all be turned off to gain FPS at a reduced image quality (IQ). If you leave SSAO and IL on, you can reduce their impact by setting SamplingQuality and FilterQuality to 2. The reverse also works: put these to 0 for added IQ. A highter Size- and SourceTexturesScale can also give better quality images.
- SSAO/DOF - In this article I show that the effect of both screen space ambient occlusion (SSAO) and depth of field (DOF) in Midhrastic on FPS are enormous. If you disable both, you get a lot of the look of full Midhrastic with a very marginal FPS hit. (I'll share less intensive DOF optionals later.) The images in the article are all rendered at 2160p using one GeForce GTX 560ti OC (I've disabled SLI) using my usual texture mods and grass settings. I'll include more shots, plus a small guide on how to render at any resolution or AR regardless of maximum monitor resolution.
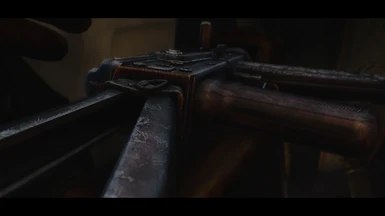
[*}WINDOWS 8 - When using Windows 8, you should use the injector version instead of the d3d9.dll wrapper version. Download that from enbdev.com and read the instructions carefully. - WEAPON TRANSPARENCY - In first person, your weapon may look transparent. This is a result of using SSAO (ambient occlusion). If you can't abide this, disable ambient occlusion in enbseries.ini (set to false), at the loss of some visual quality (but gaining some FPS).
- BRIGHT FLASHES - When in first person, some modded armour or weapon textures may cause a very bright effect that makes the entire screen turn white, or even black (because of adaptation). The only solution is to isolate the texture or effect causing this, and to avoid using it. Or don't use my mod. You could try editing the values for lens flare or specularity in enbseries.ini (lowering them) and see if that solves your problem.

T H A N K__Y O U
First off, thank YOU! For trying this. Especially if it's your first foray into using an ENB configuration to enhance your game. Not the most simple mod to install, but the benefits can far outweigh the costs, I feel. If you tried it and thought it worthwhile, or have some critical note to share: I'd like to hear from you. Leave a comment on the comment thread to let me know what you think. Or maybe drop an endorsement to show other people that this is a mod to consider using. And if you love taking a screenshot: do share it here. I get a kick out of watching what you do with this. But most of all: have fun with it, even though it is apt to bring even the most up-to-date computer to its knees.
The amount of inspiration I've gotten from reading and above all watching the submissions on the enbdev.com forums, the Nexus Imageshare and Flickr has pushed me to always try to make this better. I'm incredibly glad that Boris Vorontsov decided to start working on a game that could never hope for as much of an audience as newer releases. In doing so, he has totally revived this older gem for me. Right now, my computer has to really pull its weight to render my Wasteland again. But if anyone launched me into action to try and tweak my own version of a Fallout ENB, it was trillville. I thank you for not only thinking immediately that what works for F:NV could also be expected to work in FO3, but also for releasing a gallery of images that shines with a brilliance that comes from something else than mere tweaking and GPU cycles. Thanks to dpeasant for allowing me to use code from his unreleased shader files, and thank you all my online friends that keep edging me on: I love your good spirits, friendly banter, advice freely given, and shared talent. You people are making me regret the fact that I dubbed our Flickr group Visions of Skyrim, instead of using a more generic name. Oh, and anaphiel, thanks for inspiration for the description page. Well, theft can be a part of inspiration, right? Or was that the other way around?
C R E D I T S
Boris Vorontsov - ENBseries binary and shaders
HeliosDoubleSix - postprocessing assets in enbeffect.fx
Matso - DOF, Immersive Bloom, Anamorphic Flare
Dirty Peasant - additions to enbeffect/enbbloom code
trillville - passing the ball on some enbseries.ini values, tips on grass and fog settings, palette file (which I modified slightly), and that incredible, incredible gallery that kicked me so hard I had to do something. Get his stylish config, now.
Andrej Dudenhefner et. al - SMAA injector