About this mod
DPR (Dynamic Poster Replacer) is a utility that can randomly replace the original in-game posters with images of your choice. Cropping, conversion, and replacement are all handled automatically.
- Permissions and credits
========================================
--------------------
DESCRIPTION
--------------------
DPR (Dynamic Poster Replacer) for Fallout 3 is a utility that can randomly replace the original in-game posters with images of your choice. Everything is handled by DPR, all you have to do is tell it what images you want to use. A few effects are then applied to the posters (they can be disabled, if you so choose) to make them look older, and browner, and then converted, resized, and cropped into the right size for Fallout 3 before being copied into your Fallout 3 data folder.
If you run into any problems, feel free to send me a message. Also, screenshot uploads are encouraged (no adults only pictures please).
--------------------
REQUIREMENTS
--------------------
* Fallout 3
* Archive Invalidation: http://fallout3nexus.com/downloads/file.php?id=944
* .NET Framework 3.5: http://www.microsoft.com/downloads/details.aspx?FamilyId=333325fd-ae52-4e35-b531-508d977d32a6&displaylang=en
* XNA Framework 3.1: http://www.microsoft.com/downloads/details.aspx?FamilyID=53867a2a-e249-4560-8011-98eb3e799ef2&displaylang=en
--------------------
USAGE INSTRUCTIONS
--------------------
The first time you run DPR, it will tell you a settings file doesn't exist, and restore all settings to default. It will then ask you for your Fallout 3 installation directory. Locate, select it, and then click Ok. By default, it's C:\Program Files\Bethesda Sofworks\Fallout 3.
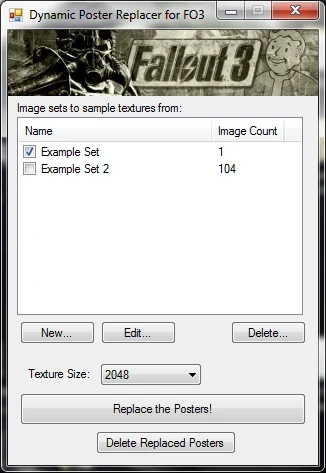
Now the main window should open up. Before you can replace Fallout 3's posters, you have to tell DPR what images it can use. Click the "New" button, give the image set a name, and add as many image files as you want. When finished, click "Done".
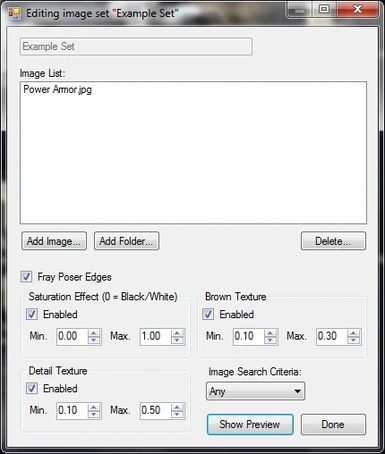
Now that you have an image set, if you select it and click "Edit", you can change how the images are modifed before being used as posters in Fallout 3. Here is an overview of the different objects in this window:
* Image List: Allows you to add or remove images to and from the image set.
* Fray Poster Edges checkmark: If checked, the in-game poster edges will be frayed (rough)
* Saturation Effect: If enabled, each poster will have it's saturation randomly set to a value between the Min and Max values. (0 = Black and White, 1 = Original Color)
* Brown Texture: If enabled, each poster will have a brown texture overlayed on top, giving it a browner look. The intensity will be randomly selected between the Min and Max values (0 = No Effect, 1 = Really Brown). Note that this texture can be replaced with your own, if you don't like the color. It's in "XNAContent\BrownTex.png".
* Detail Texture: If enabled, each poster will have a detail texture overlayed, causing it to look weathered. The intensity will be randomly selected between the Min and Max values (0 = No Effect, 1 = Full Effect) Note that this texture can be replaced with your own, if you don't like the pattern. It's in "XNAContent\DetailTex.png".
* Image Search Criteria: Before an image is selected for a particular poster, it's dimensions are checked against the target poster dimensions to see if they are of similar aspect ratio. The Image Search Criteria box let's you select how close to the right aspect ratio an image needs to be. If you create an image set with lots of images of all different aspect ratios (portrait and landscape), it is safe to increase the search criteria to medium or maybe even strict. However, if your image set only contains images that are one or the other, you will have to lower the search criteria to "Loose" or "Any". When generating the posters, if an image can't be found based on the search criteria, a message will pop up telling you to lower it. The benefit of having a stricter search criteria, is that less image cropping will occur, because the selected image will already be close to the correct size.
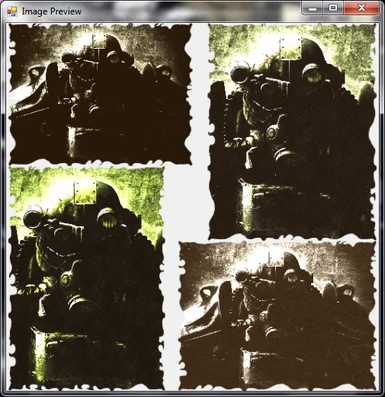
When playing with the settings, click "Show Preview" to see how they effect the final posters.
After you are done creating image sets, and changing their settings, check mark the image sets you would like to use, select a texture size (bigger = better quality, but less performance. Look at chart below for recommended size) and then click the "Replace the Posters!" button. DPR will then select random images from the checkmarked image sets, and then convert and replace the in-game Fallout 3 posters. Note that this should not be done while Fallout 3 is running!
Video Card RAM vs. Recommended Texture Size
=========================================
Less than 256 MB = 512
256 MB = 1024
512 MB = 2048
1 GB and more = 4096
--------------------
FAQ
--------------------
____________________
Q - How many Image sets do I need, and how many images need to be in each set?
A - It doesn't matter, image sets are simply for your convenience. You can either split up your images into multiple image sets (EX "Car Pics" and "Girl Pics"), or just lump them all into the same image set. The benefit of using multiple image sets is it gives you more control over which images are used. Also, each image set has it's own creation settings. For example, maybe you don't want the car pictures to have the detail texture applied, but the other images you do. Using multiple image sets allows you to do this.
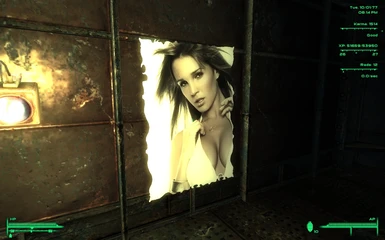
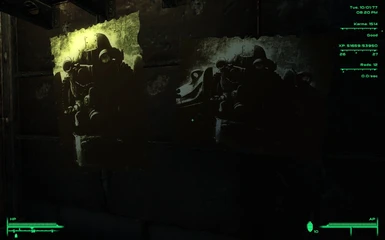
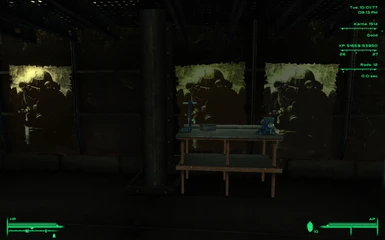
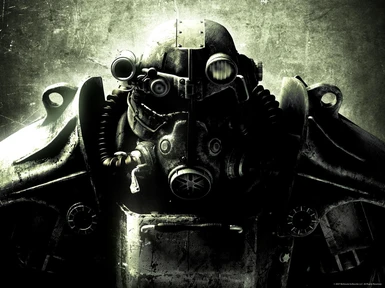
Also, you can have any number of images in a set. If your total number of images (checkmarked image sets combined) is less than 16, then DPR will just use some of the same images twice. For example, the two in-game screenshots I took were with a single image set with only one image, which is why all of the posters are the same. For the best results, it's recommended to have a total image count of over 16.
____________________
Q - I have a bunch of images added to my image set, but DPR keeps selecting the same ones!
A - Lower the search criteria on your image set. DPR tries to find images that are close to the same aspect ratio as the Fallout 3 posters to reduce image cropping. If DPR keeps selecting the same posters, it's because those are the only images that fit the selected search criteria.
____________________
Q - I want to take a screenshot of a specific poster, but DPR isn't choosing the right one
A - DPR was designed so that each time you replace the posters, you get different images. If you want to take a screenshot of a specific poster, do the following:
1. Uncheck all of your image sets.
2. Create a new image set, rename it something like "Screenshot poster" or w/e, and only add the image you want to screenshot. Choose your creation settings, make sure the image search criteria is "Any".
3. Ensure that it's the only image set checked, then click "Replace the Posters!"
4. Open Fallout 3, now every poster in the game should be replaced with that image.
____________________
Q - When I'm in-game, some of the posters are black.
A - Lower the texture size.
____________________
Q - When I click the "Replace the Posters!" button or "Show Preview" button, it says an error has occurred.
A - Did you install the XNA framework 3.1? If so, try lowering the texture size. It may be because your computer doesn't have enough video ram to load textures of that size.
____________________
Q - I'm getting an error message!
A - If you are using Vista/Win7, try running DPR as Administrator (Right Click -> Run as Administrator). if that doesn't fix it, send me a screenshot of the error.
____________________
Q - Who is that girl in the screen shot?
A - Sorry, I don't know :(
--------------------
VERSION HISTORY
--------------------
Version 1.02 - Minor update, DPR will now look for the "Data" folder instead of "Fallout3.exe"
Version 1.01 - Very minor update, fixed text in two message boxes.
Version 1.0 - Initial Release


